
Baking tortilla chips might seem simple, but it’s a game-changer when you’re looking for a crispy snack without the greasy mess of frying. There’s something satisfying about controlling the salt and seasoning, making each batch just how you like it. Plus, the oven gives you a more even crunch that’s hard to beat.
I’ve always loved how homemade chips turn out when baked—crisp, flavorful, and way less oily. It’s a small act of kitchen rebellion, really, to skip the deep fryer and still get that perfect crunch. And honestly, once you get the hang of it, it’s so easy, you’ll wonder why you ever fried them in the first place.
Focusing on how baking tortilla chips can be a healthier, less oily alternative to frying, highlighting the importance of control over salt and seasoning, and emphasizing the crispy texture achieved in the oven versus traditional frying.
The story behind this recipe
- One afternoon, I found a bag of stale corn tortillas shoved to the back of the pantry. Instead of tossing them, I decided to bake my own chips as a way to salvage what I had. The aroma of toasting corn and salt filled the kitchen, and I realized how much I preferred these crispy, oven-baked chips over the greasy store-bought ones. It’s become a little ritual whenever I want a snack that feels just right—crisp, savory, and satisfying without the oil slick.
- Since then, I’ve kept experimenting, tweaking seasonings and bake times, but that first batch still sticks out as a reminder: simple ingredients, honest process, and a bit of kitchen improvisation can turn leftovers into something worth crunching on.
- heading
Ingredient breakdown: key components
- Corn tortillas: I use plain corn tortillas, their slightly grainy surface crisps up beautifully—try whole wheat for a nuttier flavor.
- Olive oil: A light brush of olive oil helps the chips crisp evenly and adds a subtle fruitiness—skip it if you prefer less fat.
- Salt: I like a good pinch of sea salt for that burst of savory—adjust to your taste or try smoked salt for a smoky kick.
- Paprika or chili powder: A sprinkle adds smoky warmth and color—go mild or spicy, depending on your mood.
- Cumin: I love a dash of cumin for depth—skip if you want a more neutral chip or prefer a different spice blend.
- Lemon zest: Brightens the flavor with a zing—consider lime zest for a more citrus punch or skip for a pure corn taste.
- Optional seeds: Toss in sesame or poppy seeds for texture—just a teaspoon for visual detail and a nutty crunch.
Spotlight on key ingredients
Corn tortillas:
- I rely on plain corn tortillas, their slight graininess crisps up beautifully—try whole wheat for a nuttier twist.
- Olive oil: A light brush of olive oil helps achieve even crispness and adds a subtle fruity aroma—skip if you want less fat.
- Salt: I use a good pinch of sea salt for that savory punch—adjust to taste or experiment with smoked salt for depth.
Seasonings:
- Paprika or chili powder: Adds smoky warmth and vibrant color—mild or spicy, depending on your mood and tolerance.
- Cumin: A dash of cumin lends earthy depth—omit if you prefer a purer corn flavor or try coriander for a different note.
- Lemon zest: Brightens everything with zing—lime zest is a good swap, or just skip if you want pure corn taste.
Notes for ingredient swaps
- Dairy-Free: Use a splash of water or a flavorless oil instead of butter or cheese—less creamy, but still crisp.
- Vegan: Swap eggs with aquafaba or a bit of cornstarch mixed with water for binding—crisp texture remains.
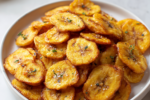
- Gluten-Free: Ensure tortillas are certified gluten-free or try plantain chips as a crunchy alternative.
- Low-Sodium: Choose unsalted or low-sodium tortillas, then control salt in your seasoning to suit taste.
- Extra Flavour: Add a pinch of smoked paprika or cumin to the oil before brushing for more smoky depth.
- Spicy Kick: Mix chili powder or cayenne into the oil or seasoning blend—adjust to your heat preference.
- Herb-Infused: Toss in dried herbs like oregano or thyme with your seasonings—adds aromatic complexity.
Equipment & Tools
- Baking sheet: To hold and bake the chips evenly.
- Pastry brush: To lightly coat tortillas with oil.
- Sharp knife or scissors: To cut tortillas into desired chip sizes.
- Wire rack (optional): To cool and crisp the chips further after baking.
Step-by-step guide to baked tortilla chips
- Preheat your oven to 180°C (350°F). Gather a baking sheet, a pastry brush, and a sharp knife or kitchen scissors.
- Stack your tortillas and cut them into quarters or sixths, depending on your preferred chip size. Keep them in a bowl or on a plate.
- Lightly brush both sides of each tortilla piece with olive oil. Use just enough to coat, about 1-2 teaspoons per batch.
- Arrange the coated tortilla pieces in a single layer on the baking sheet. Leave space between each for even crisping.
- Sprinkle with salt, paprika, cumin, or your favorite seasonings. Be generous but balanced—these are chips, after all.
- Bake for 10-15 minutes. Start checking at 10 minutes. They should be golden at the edges, crispy but not burnt. They may puff slightly.
- If some chips are browning faster, shift the sheet or remove the darker ones early. Keep an eye on them; they tend to go from perfect to burnt quickly.
- Remove from oven and let sit for 2-3 minutes. They will crisp up further as they cool. Transfer to a wire rack if needed.
- Taste a chip—if it’s not crisp enough, pop it back in for another minute or two. If it’s over-browned, reduce oven temp slightly next time.
- Serve warm or at room temperature. Store leftovers in an airtight container for up to 2 days, re-crisp in a 150°C (300°F) oven for 5 minutes if needed.
Allow chips to cool slightly on a rack. Serve immediately or store in an airtight container. For extra crispness, reheat at 150°C (300°F) for 5 minutes before serving.
How to Know It’s Done
- Color: Chips should be golden at the edges with a firm crunch.
- Texture: They should snap easily when broken, not bend or feel soft.
- Aroma: Smell nutty and toasted, indicating proper crisping without burning.
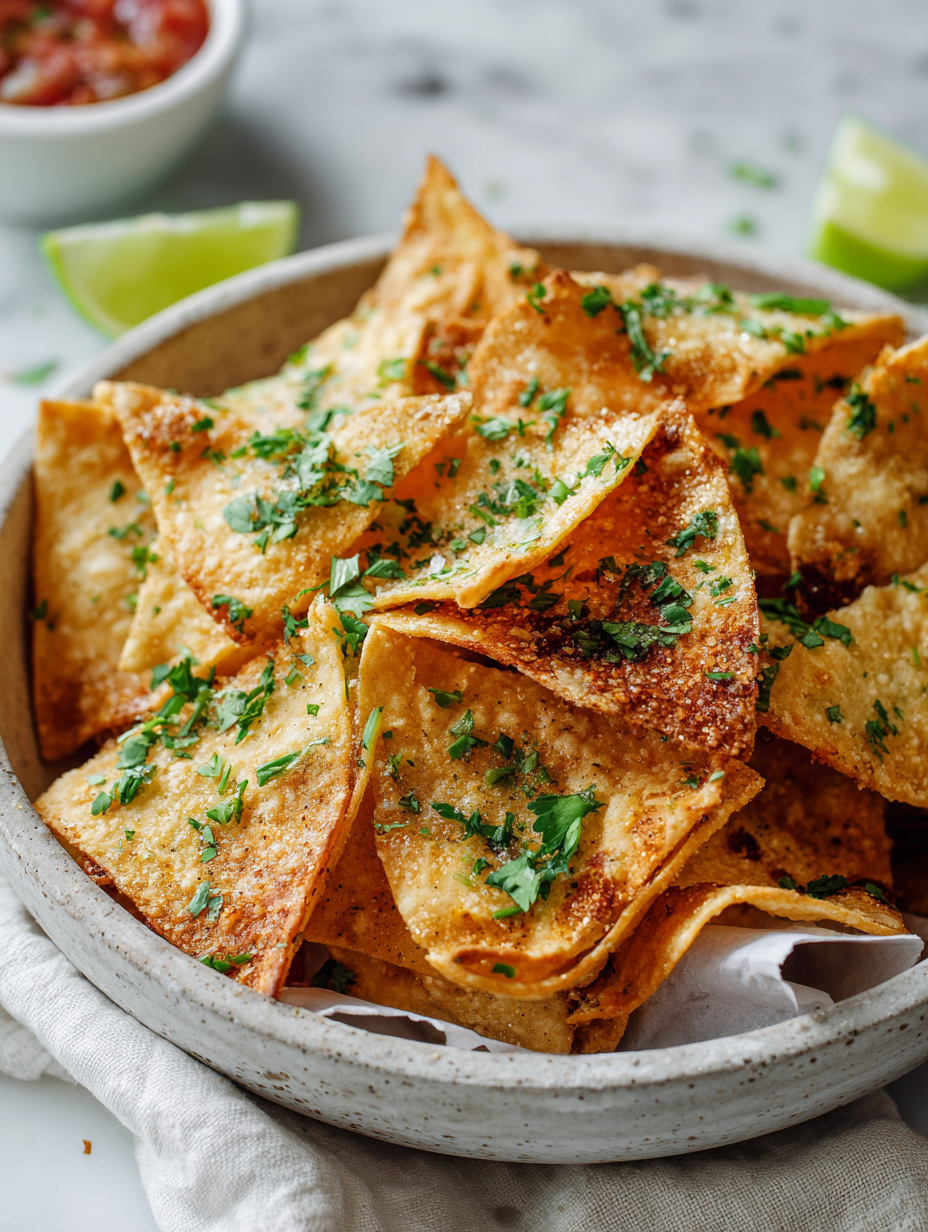
Baked Tortilla Chips
Ingredients
Equipment
Method
- Preheat your oven to 180°C (350°F) and gather your baking sheet, pastry brush, and a sharp knife or scissors.
- Stack the tortillas and cut them into quarters or sixths, depending on your preferred chip size. Keep the pieces in a bowl or on a plate for easy handling.
- Use a pastry brush to lightly coat both sides of each tortilla piece with a teaspoon or two of olive oil. This helps them crisp evenly and adds flavor.
- Arrange the oiled tortilla pieces in a single layer on your baking sheet, leaving space between each to allow for crisping.
- Sprinkle the chips evenly with a pinch of sea salt, paprika or chili powder, cumin, and lemon zest. Add seeds if using, for extra texture and visual appeal.
- Bake the chips in the oven for about 10-15 minutes, checking at the 10-minute mark. They should be golden brown at the edges and crispy to the touch.
- Once baked, remove the chips from the oven and let them cool on the baking sheet for 2-3 minutes to further crisp up. If you have a wire rack, transfer them there to cool completely.
- Taste a chip and if it’s not quite crispy enough, pop it back in the oven for another minute or two. Be careful not to burn them!
- Once cooled and crispy, serve your homemade baked tortilla chips immediately or store in an airtight container for up to two days. Reheat briefly at 150°C (300°F) if you want to restore their crunch.
Pro tips for crispy baked chips
- Bolded Mini-Head: Use a light hand with oil → too much oil makes chips greasy, so just a thin coat helps crisp them up.
- Bolded Mini-Head: Evenly cut tortillas → uniform sizes ensure all chips bake at the same rate, avoiding burnt or undercooked pieces.
- Bolded Mini-Head: Watch oven closely → start checking at 10 minutes; chips can go from perfect to overdone quickly.
- Bolded Mini-Head: Rotate baking sheet → halfway through baking, rotate for even coloring and crispness.
- Bolded Mini-Head: Cool on a rack → allows steam to escape, keeping chips crispy and preventing sogginess.
- Bolded Mini-Head: Season before baking → sprinkle spices on tortillas before baking for even flavor distribution.
- Bolded Mini-Head: Use parchment paper → prevents sticking and makes cleanup easier, especially if oil is used sparingly.
Common mistakes and how to fix them
- FORGOT to check oven temperature → calibrate oven for even baking.
- DUMPED too much oil → use just enough to lightly coat tortillas.
- OVER-TORCHED chips → reduce baking time or oven temperature.
- WENT too thick with seasoning → sprinkle lightly for balanced flavor.
Quick fixes and pantry swaps
- When chips are soggy, splash them with a quick spray of water and bake again for 2 minutes.
- If chips are unevenly cooked, patch with a quick rotation of the baking sheet mid-bake.
- DUMPED too much salt? Rinse chips briefly and pat dry before baking to balance flavors.
- When chips burn quickly, shield the edges with foil and lower oven temperature by 10°C (20°F).
- Splash a little lime juice on dull chips for a fresh burst and shimmer of flavor.
Prep, store, and reheat tips
- Prepare tortilla cuts and seasonings ahead—store in an airtight container for up to 24 hours to maintain freshness and prevent moisture absorption.
- Bake the chips completely, then cool completely before storing—keeps them crispy for up to 2 days in an airtight container.
- Reheat in a 150°C (300°F) oven for 5 minutes—resting helps restore their crunch and aroma. Watch for that toasted smell and crisp texture.
- For longer storage, freeze baked chips in a sealed bag for up to a month—reheat directly from frozen for a quick crunch revival.
Top questions about baked tortilla chips
1. How do I pick the best tortillas?
Look for tortillas that feel firm and slightly dry; avoid soft or soggy ones for crispier chips.
2. What should baked tortilla chips look and feel like?
Pre-bake, they are crispy and golden at the edges, with a satisfying crunch when broken apart.
3. Can I skip the oil?
Use a light brush of oil to help them crisp up without becoming greasy; too much oil makes them soggy.
4. How long do I bake the chips?
Bake at 180°C (350°F) for about 10-15 minutes; check early to prevent burning and ensure crispness.
5. How should I store baked tortilla chips?
Store in an airtight container at room temperature; reheat at 150°C (300°F) for a few minutes to revive crunch.
6. How do I cut the tortillas for even baking?
Use a sharp knife or kitchen scissors to cut tortillas evenly; uniform pieces bake more evenly and stay crispy.
7. Can I customize the seasoning?
Adjust seasoning to your taste; start with less salt and spices, then add more after tasting.
8. Can I use stale tortillas?
Yes, you can bake leftover tortillas; just cut and season them, then bake following the same method.
9. How do I know they are done?
They should crackle when broken, be golden at the edges, and feel firm but not brittle.

10. Can I add different spices?
Yes, adding spices like smoked paprika or cumin enhances flavor; experiment to find your favorite mix.
Baked tortilla chips are a quiet victory in my kitchen—crisp, flavorful, and so easy to make. They remind me that you don’t need much to turn simple ingredients into something satisfying. Sometimes, a small batch of homemade chips is all you need to brighten a lazy afternoon.
And honestly, once you get the hang of baking them just right, there’s no turning back to store-bought. They’re a flexible snack—seasoned how you like, perfect for dipping or munching plain. That crunch, that aroma, it’s a reminder that good snacks start with honest, simple steps.